Early in dive training, students learn that there are three elements involved in buoyancy control: the buoyancy compensator (BC), weights and lung volume. Although most divers are familiar with the need to be properly weighted, many do not understand all that it entails. Students and experienced divers alike make two common errors when it comes to weighting: diving while overweighted and failing to adjust the amount of weight used in response to changes in equipment and environment.
Don’t Work Too Hard
Improper weighting makes it harder to achieve neutral buoyancy. Many divers who wear too much weight do not even realize they are overweighted. The excess weight means that to achieve neutral buoyancy the diver has to put more air into the BC bladders, which can create a more upright profile in the water. The upright position increases drag when swimming, causing the diver to expend more effort and consume more air. Underweighted divers can also become significantly fatigued while trying to stay down. In addition to increasing breathing-gas consumption, extra exertion can elevate decompression stress.
Get It Right
You may have heard a diver say, “This is how much weight I always use.” While field testing and prior experience can be useful, this statement shouldn’t be the endpoint of a dialogue about weighting. Proper weighting requires thought and practice, and the amount of weight worn is not fixed. Over the course of our lives, we experience change in muscle mass, body fat and physical fitness. Equipment, including wetsuits, wears out and gets replaced. Dive environments differ. All these factors affect buoyancy and require adjustments to the amount of weight used.
To determine how much weight you need, consider your body weight, the exposure protection you will be wearing, the weight of your equipment and the environment in which you will be diving. Start with weight equivalent to 10 percent of your body weight, which is a good baseline for a 6mm full wetsuit. For a 3mm suit, use 5 percent of your body weight. Remember that these percentages are simply starting points.
Drysuits and thick neoprene necessitate more weight to counter the suits’ buoyancy than do thin neoprene or dive skins. Body composition (muscle density, for example) will influence whether more or less weight is needed. Diving with an aluminum tank requires more weight than diving with a steel tank.
Saltwater is denser than freshwater, thus increasing the buoyancy of immersed objects and requiring more weight to descend. Dive training typically begins in freshwater environments such as pools, quarries or lakes, so new divers should consider that even if they are wearing the same exposure protection they will need to add weight for ocean diving. The exact amount of additional weight needed will vary from person to person. Performing a buoyancy check in each situation will help determine the correct amount of weight to add.
Secure It
There are several options available for how and where to secure your weights. A weight belt is the most common method of wearing weights; there are belts that accept slide-on weights as well as pocket belts that can accommodate either solid weights or soft weights (bags filled with lead shot).
Weight belts are easy to ditch in an emergency as long as you keep other gear clear of the belt. A shoulder harness is sometimes used when the buoyancy of thermal protective suit requires more weight than can comfortably be worn around the waist.
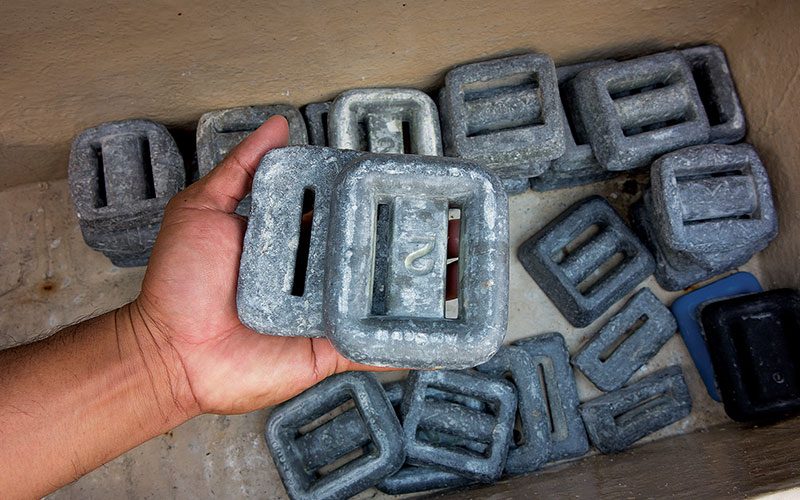
Integrated weight pockets and harness systems offer a couple of advantages over belts: They can be considerably more comfortable, and they offer improved ability to adjust trim. But unlike belts, which have a single point of release, harnesses and integrated systems may have more than one release point. This is crucial information for the diver and dive buddy to discuss prior to diving — and to remember in the event of an emergency. A downside to using weight pockets is that it may be more difficult to add or remove weights if adjustments need to be made.
Stay Trim

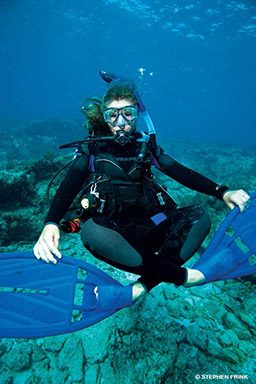
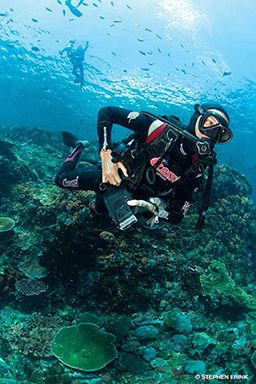
In addition to wearing the right amount of weight, make sure it’s positioned to optimize underwater trim. Creating a level profile in the water makes you more hydrodynamic. Distribute the weights as equally as possible from side to side; you should never feel as though you are listing to one side while diving. You should also consider the weight of your scuba tank and the style of your BC when placing your weights. The tank can be moved up or down in the tank band to facilitate optimal body positioning in the water. Back-inflation BCs have a tendency to push the diver forward (face down) in the water, so placing weights toward the back can help to counter some of this forward pitch, especially at the surface. While weight pockets on the back of your BC can help with trim, they also present a hazard in an emergency because buddy assistance is required to remove them if ditching weight becomes necessary.
Fins can be positively, neutrally or negatively buoyant, and each type may require compensation. Ankle weights can help offset a more buoyant lower body half, but they may be a challenge to ditch, because you have to reach to release them. If your fins are negative and create a downward pull on the lower half of your body, moving weights higher on your body or shifting your tank higher in the band can move up your center of gravity to promote a more level profile.
Reviewing where and how your buddy’s dive weights are placed is an essential component of every predive check. Each buddy needs to know how to jettison the other buddy’s weights in an emergency.
Learning to determine proper weighting will enhance your enjoyment of dives as well as your safety. Having a good understanding of your baseline weighting needs and the factors influencing your buoyancy will aid you in adjusting to a variety of environments and conditions.
How to Perform a Buoyancy Check
Start in water too deep to stand in, and release all the air from your BC. Inhale a normal breath, and the water should be at eye level. When you exhale, you should sink so that the water is just over your head and then rise to eye level as you inhale normally again.
Adjust your weights in small increments (e.g., two pounds at a time). Consider adding a little extra weight to offset the potentially positive buoyancy of a partially emptied aluminum cylinder at the end of the dive.
If you are properly weighted, you should be able to hover effortlessly at 15 feet at the end of your dive with 500 psi in your aluminum tank and no air in your BC.
© Alert Diver — Q4 Fall 2014